Step-by-step on How to Install and Configure Windows Server 2012 iSCSI Target SAN
So, this post is gonna explain steps to build an iSCSI SAN using only Windows Server 2012. If you do not already know, instead of a separate download and install for the iSCSI target software in Windows Server 2008 R2, this feature comes build into the latest build of Windows.
First up, now all you need is a plain vanilla installation of Windows Server 2012. It does not need to be part of a domain and that’s how it’s gonna be for me in this posting.
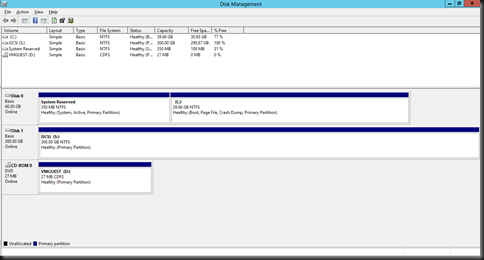
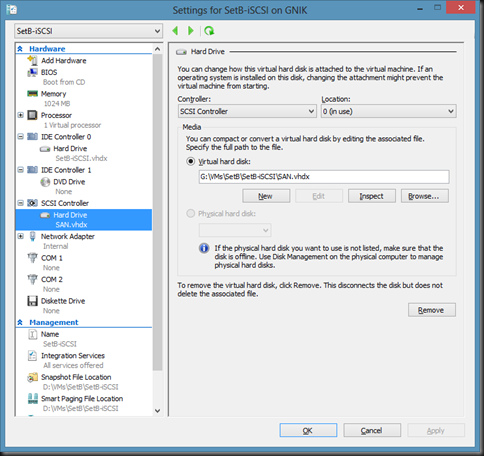
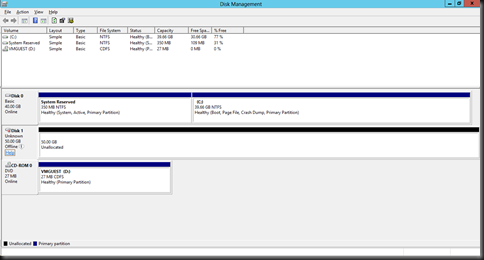
Ensure that you have enough disk space on your VM, so in my case I’ve got another drive just for my iSCSI.
Here’s how my VM configuration looks like.
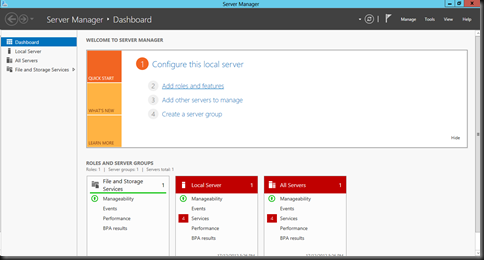
Once you’ve set a static IP address – best practices :), in Server Manager, click Add Roles and Features.
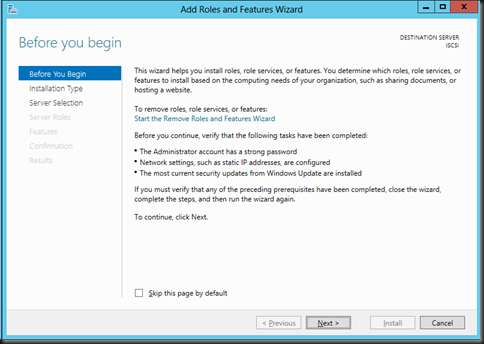
Click Next on the Add Roles and Features Wizard
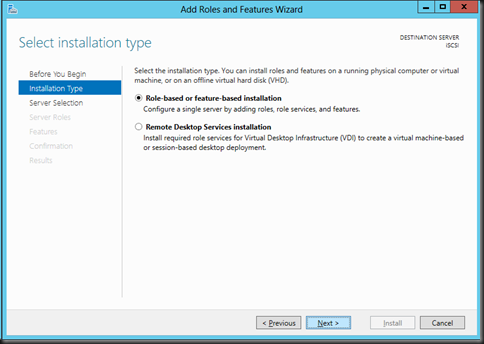
Select Role-based or feature-based installation and then click Next.
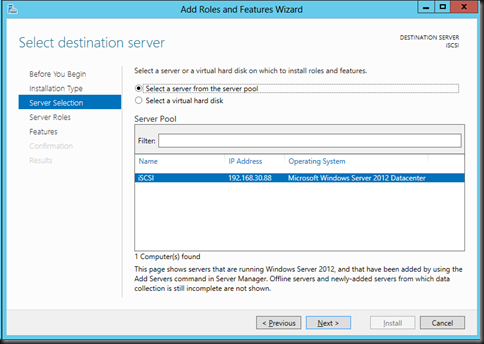
Just ensure that you’ve got the right server listed there, then click Next.
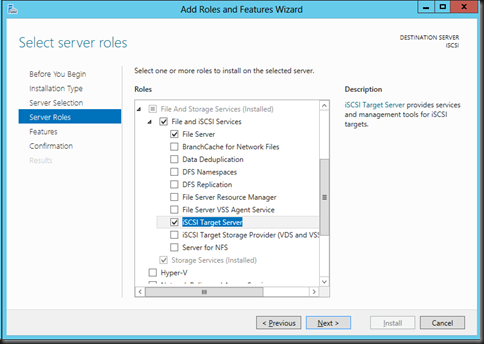
Expand File And Storage Services > File and iSCSI Services, then click to select iSCSI Target Server, then click Next.
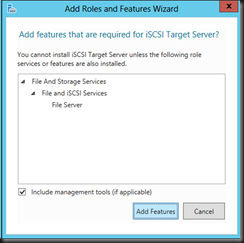
If a windows appears, click Add Features.
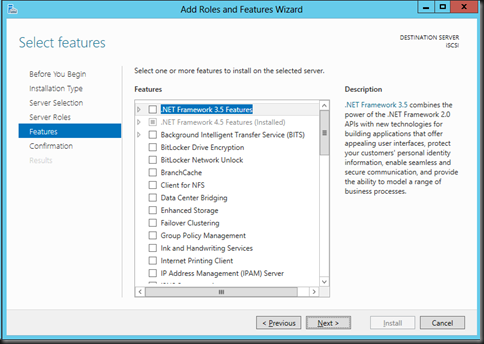
No features to install here, so just click Next.
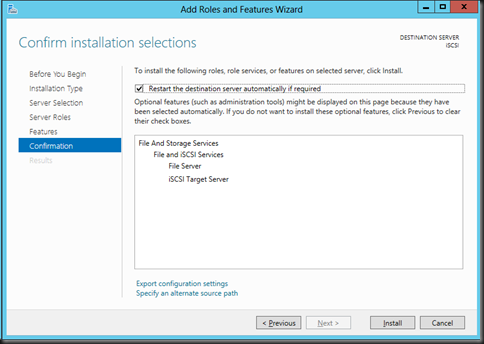
Click to select Restart the destination server automatically if required and then click Install.
If a window appears, click Yes.
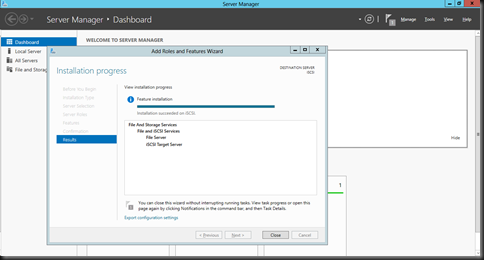
Be patient and you’ll see that the role is installed successfully.
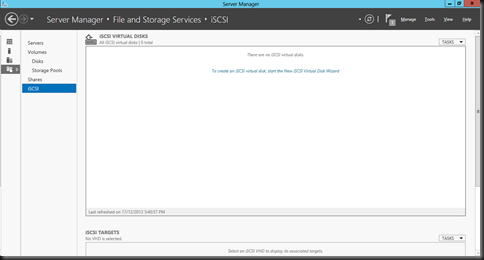
Next, to configure it go to Server Manager > File and Storage Services > iSCSI. Click on To create an iSCSI virtual disk, start the New iSCSI Virtual Disk Wizard.
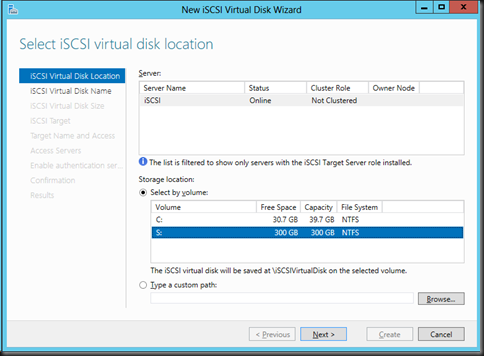
Select where you would like to create the virtual disk then click Next. For me, I’ve chosen to place it in the S: drive.
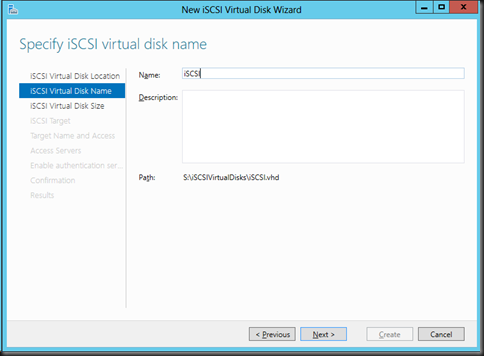
Give it a name.
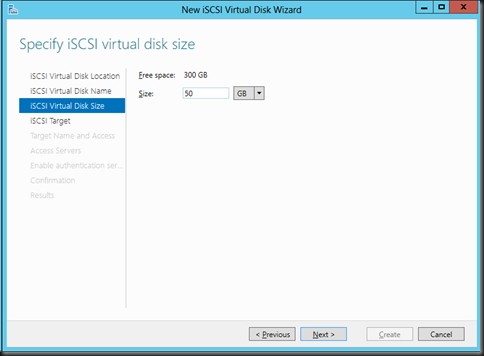
I’m just gonna give a 50GB but that’s up to you.
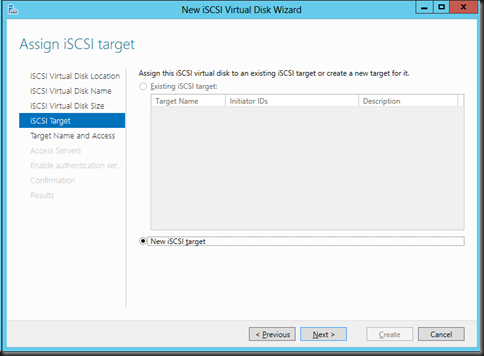
I’m creating a new iSCSI target, click Next.
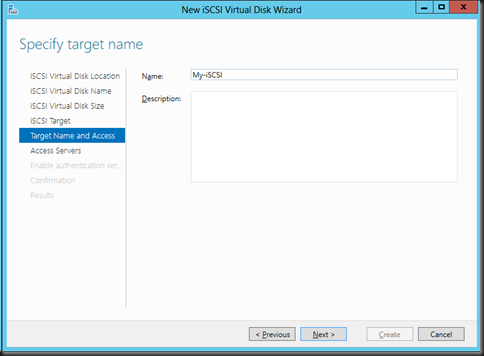
Provide a name for your target then click Next.
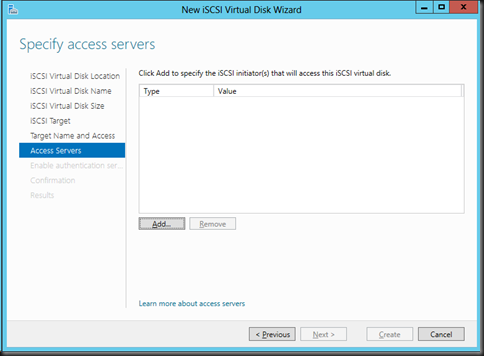
Click Add to add the servers that will be connecting to your iSCSI SAN.
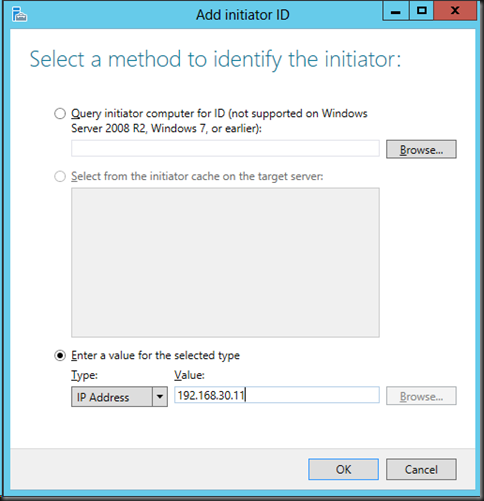
Since I know the server that is gonna connect to my SAN, I’m just gonna add it here.
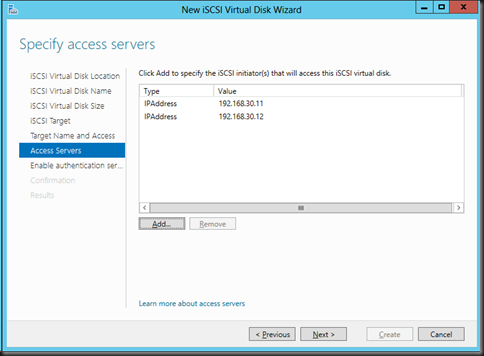
So now I’ve got 2 servers ready to connect to my SAN.
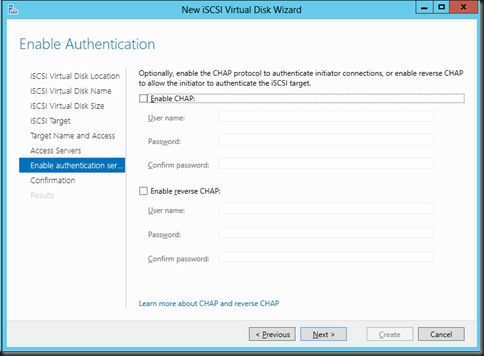
Use the defaults and then proceed.
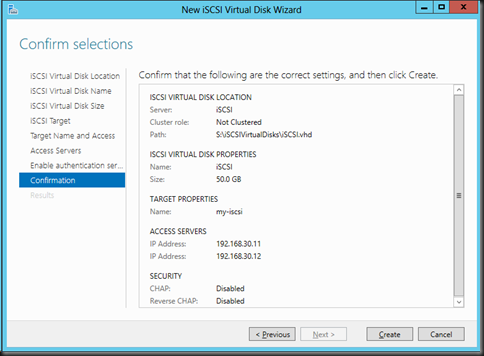
Confirmation..click Create.
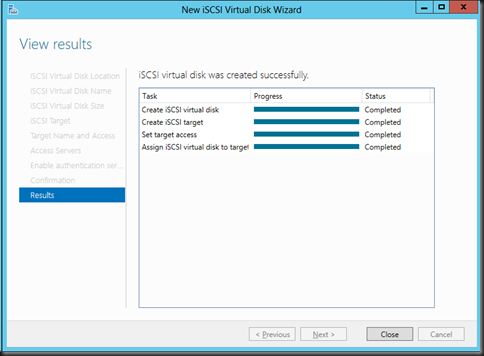
And it is done!
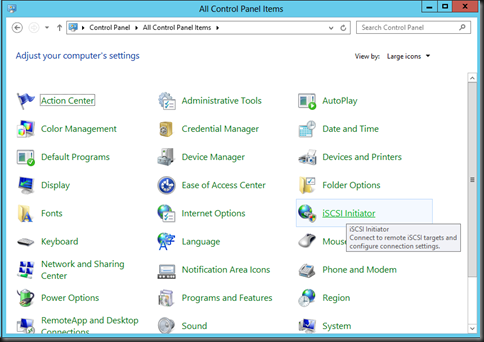
Now, that’s ready for the 2 server to connect to it. So on the servers, go to Control Panel > iSCSI Initiator.
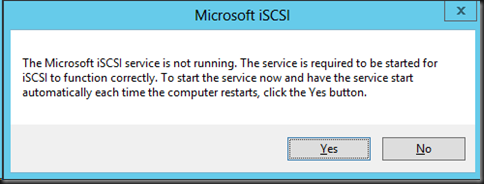
Click Yes to start the iSCSI service.
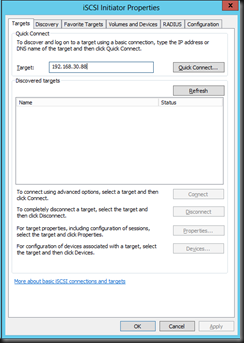
Enter the IP address of your iSCSI SAN which you’ve just configured, then click Quick Connect…
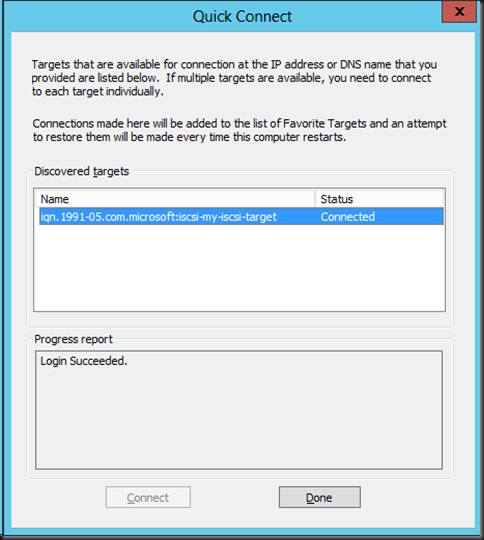
It will show connected.
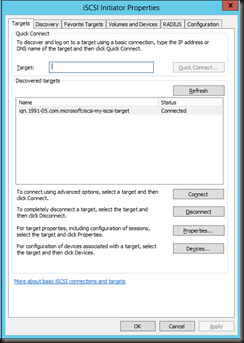
Now you’re connected to the SAN.
Going to your Disk Management indeed shows you’ve now got a new drive.
Enjoy!!!

Pingback: Creating a SQL Server 2012 Cluster (Part 1) « Teh Wei King's System Center Blog
Excellent guide. Perfect stey-by-step. Thanks!!!
December 19, 2012 at 5:09 am
Thanks. Now I know it is benefiting someone out there.
December 19, 2012 at 8:48 am
Don’t under estimate the skill to pass on your knowledge. We don’t always have time to type a Thank You message even tho we SHOULD. Please keep updating your blogs, it will help someone somewhere at some point 🙂
Thank You
March 15, 2013 at 7:01 pm
Nice job and well step-by-step guide, pretty useful in my lab. Thank you Weiking !
April 16, 2013 at 9:13 pm
thanks bro for the instillation step ^ ^
June 1, 2013 at 10:46 pm
Your step by step guide helped me prepare my first iSCSI shared volume for a failover clustering solution. Thanks a lot brother.
July 11, 2013 at 3:51 pm
Awesome, bro.
July 11, 2013 at 7:15 pm
Is it for windows server Installation
December 17, 2013 at 2:34 pm
Well, it is build with a Windows Server installation but once it is done, any server to should able to use as an iSCSI target just like any other iSCSI SAN.
December 18, 2013 at 10:01 am
Thanks for your perfect step by step guide
March 6, 2014 at 11:30 am
Great job. Thanks!
March 27, 2014 at 6:45 pm
Great guide. For some reason my Microsoft Lab Manual decided not to include these steps in the process of connecting with iSCSI…so thanks a lot!
March 28, 2014 at 4:20 am
i like it keep doing best.
May 3, 2014 at 8:16 pm
Great guide!
May 23, 2014 at 4:04 am
Hi, I am planning to create a print cluster using VM in which i need a storage and for that is it possible to use this shared volume for the storage from windows server 2012. Please help as it would reduce the cost and also reliable may be
July 29, 2014 at 10:56 pm
thanx a lot it is really helpful
August 1, 2014 at 6:09 pm
so is it always a requirement that iSCSI has to be configured with windows server???
August 1, 2014 at 6:13 pm
That’s terrific. Thank you a lot!!! good job
September 2, 2014 at 9:45 pm
Thanks body for this quite interesting job
September 5, 2014 at 11:46 am
Great! really helpful
September 11, 2014 at 4:19 am
nice……………..
September 16, 2014 at 6:20 pm
wonderful!thanks a lot. very helpful.
September 24, 2014 at 9:26 pm
Good piece of information in a very simple and interactive way.
Thanks
Saket Saurabh
January 7, 2015 at 4:04 am
i’m satisfied for studies
February 3, 2015 at 11:50 am
Thanks a lot friend, very nice step by step explanation keep it up!
March 15, 2015 at 4:32 am
very nice tips
April 6, 2015 at 4:54 pm
thanks weiking for this simple step-by-step guide . great job
May 25, 2015 at 6:14 pm